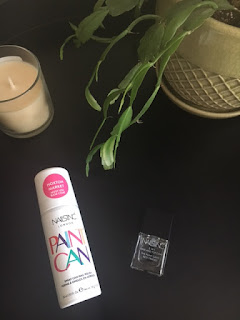
We should probably file this one under "things I just could not resist trying for myself." We all know that at-home manicures are definitely cheaper (and you can do them in your PJ's!), but not necessarily easier. Enter in the Nails Inc. Paint Can which you literally just spray onto your nails like spray paint. I know what you're thinking: Does it work? Well today I'm putting it to the test!
When I texted my sister and told her I was doing this her first reaction was "oh my god!" And her second reaction was "wait, how does that work?" I don't even know why she's still surprised at this point. But how does it work? Well, it involves an accompanying 2-in-1 base and top coat that has to be purchased separately called The Paint Can's Best Friend. Here's the step-by-step guide.
Step 1: Paint your nails with the base coat and let it dry.
Step 2: Shake the Paint Can and then spray your nails from about 4 inches away (the polish will also get on your skin and that's ok!). Let it dry for a couple of minutes.
Step 3: Paint your nails with the top coat and let it dry.
Step 4: Wash your hands with soapy warm water to remove the excess polish (being patient and gentle here is key).
Some (hopefully) helpful tips:
-Be extra careful when painting the base coat because that's what the polish is going to stick to (so try to stay away from your cuticles and cover the entire nail).
-I highly recommend laying down some newspaper or an old sheet when you are spraying the polish because it does get EVERYWHERE.
-Spray as evenly as you can and don't be afraid to do a couple of thin coats instead of all at once. Make sure you're staying about 4 inches away and not too close.
-Try not to touch anything you care about until your have washed the excess polish off your hands (she says as she scrubs neon pink off her T.V. remote).
-As I mentioned above, washing off the excess polish works best if you take it slowly and gently.
Now that we've established how it works, let's talk about if it works. Honestly, the whole thing went much better than I expected it to. After reading some pretty negative reviews my expectations were less than high. It seemed like a lot of steps for something that claims to be fast, but I was pleasantly surprised to find that the base/top coat dried pretty quickly so I didn't have to wait long between each step.
Currently the Paint Can comes in only three colors: Mayfair Lane (light pink), Shoreditch Lane (metallic silver), and Hoxton Market (hot pink). I'm guessing there are plans to expand on the color selection depending how well this first run goes over. Obviously I opted for the hot pink. It's a gorgeous color with a light shimmer to it and the color payoff is pretty good.
Now let's talk about durability. This is where it gets a little rocky. I started seeing some chipping after the first day of wear, particularly on my thumbs. The chipping is mostly centered on the nails I use most often (thumbs and index fingers). Here's a shot of each hand after 3 solid days of wear:
You can get the Paint Can for $12 with an additional $8 for the Paint Can's Best Friend 2 in 1 Base and Top Coat. The Paint Can is available from the Nails, Inc. website and Sephora.
So what's my final verdict here? The entire experience of applying the Paint Can was actually really fun! It was a nice little break from the "normal" process of painting my nails. With that being said, I wish it didn't chip so quickly. But I think with some improvements to the formula Nails, Inc. could really be onto something here!
Is it perfect? No. But if you're looking for something fun and new to splurge on then this might be exactly what you're looking for! Let me know if you're planning to try the Paint Can in the comments.
XO- Brittney


No comments:
Post a Comment